HOW I EDIT MY INSTAGRAM PICTURES!
Hi,
and welcome back to a new post.
This time I will take you through the process of How I edit my pictures, what filters I use and what my secrets are to keep a cohesive feed.
Now you are probably wondering what you need to consider when taking and then editing pictures. For a cohesive look of your pictures the most important part is finding your colour palette. This should not consist of many colours but rather of 2-3 main colours and a pop of colour here and there to compliment each other perfectly. For me, my colour palette is mainly brown and white with an overall bright look. A pop of colour here and there is perfect and won´t ruin your feed as long as you keep to your usual editing and this is what I will show you today. Another point to be aware of is the structure of your feed. Personally I will probably never post more than two of the same kind of pictures next to each other which means for example never three selfies in a row. It will not happen regularly that there is a coffee, outfit or architecture post next or on top of each other. By doing so you will get the structure that makes your feed more vibrant, interesting and aesthetic.


Let´s get started.
For the editing I use four different apps - some more, some less. The apps are Facetune, VSCOcam, Snapseed and Instagram.


Facetune is usually the App I start with depending on which photo I want to edit. The best part about Facetune is the whitening tool which is normally used to whiten your teeth. But we are cooler than that and use it to either make areas which are already kind of white even clearer or to desaturate/whiten specific areas in the photo to match the feed and colour palette. Another great feature is the overlay tool which you can use to get rid of tiny spots you don´t want to be seen in your picture.
Next, we come to VSCOcam, probably my favourite of all because it´s filters are just gorgeous. This app I simply only use for the filters, for cropping and sometimes small adjustments. That´s it but probably the most important part of my editing process.

Snapseed is an app I don´t use that often but if I do it makes all the difference. With it´s selective editing tool you can fix nearly everything that needs a little help considering brightness, contrast and saturation. I will come to this tools later on with my examples.

The last app on the road down to the perfect picture is an app you will all know: Instagram.
I think it´s editing tools are way too underrated and make a huge difference. This last step with nearly the same editing all the time plays a huge role of achieving the cohesiveness of my feed.
The first example: Food and coffee pictures
For the first picture we are editing one taken at the outside of a Café. At fist I uploaded the picture to Facetune and used the whitening tool on the table, bench, ground and coffee. This way the brown of the bench and table lose it´s yellow tone as well as the coffee. This will build the base for the filter I will following use on VSCOcam.
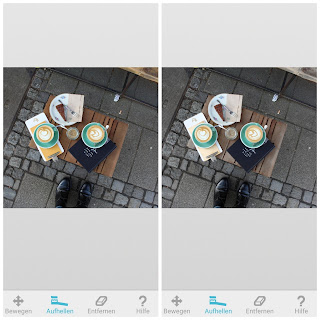
comparison: Before and After
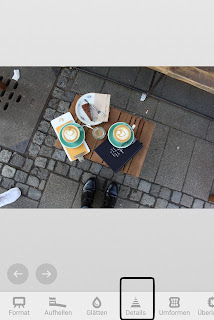
In the next step I went to the details tool and went over the latte art a bit, to really highlight it.
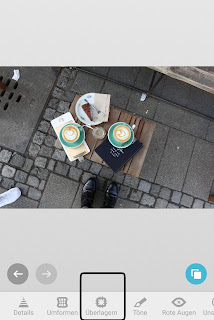
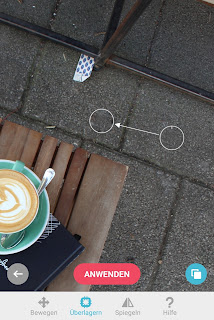
Going on to the overlay tool. This is a great way to later on remove things that should not be seen in the picture. I simply move the circles, choose a spot that is clean (in the example the ground) and move the other one over the thing (in the example a cigarette) I want to remove. Et voila!
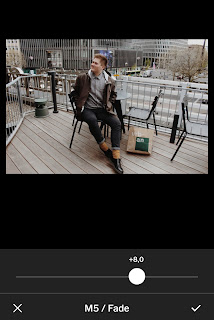
After these steps I save the picture to my camera roll and upload it to VSCOcam. I really love this app for the filters and always use M5! This filter gives the brown tone to my pictures and helps to maintain a cohesive feed.
So at first I went to the brightness and turned that down a little. By doing this the filter will look differently than it would have done before. Another great point about turning the brightness down is that I can really go out with brightness on Instagram after the following steps.


I then usually crop my pictures also on VSCocam as I really love how precise you can do it on there.
Attention: When you crop your picture always keep in mind that through the cropping it might appear differently on your feed which is why I usually like to crop it into a square.


As already said I normally use the filter M5 on all my pictures which helps a lot to keep my feed in the same colour palette. To keep the structure and cohesiveness of your feed I would suggest to not use too many filters, I would say about 1-2.


Down below you can see the comparison between the picture before I uploaded it to VSCOcam and after.

Next step: Going to Instagram. Instagram is always my final app when I edit because it is very important for the brightness and after the editing I can simply upload it to my test account to see if it matches my feed.
So I started with brightness. For this point I really like to have my picture really bright (sometimes I even go up to 100). If I would not have turned down the brightness on VSCOcam the filter wouldn´t look the same and I would also not be able to have my picture that bright.


After that I always use highlights. Normally I turn these up a bit because it additionally brightens up the whole picture but this time I slightly turned down the highlights because the picture was bright enough.


The last thing I do on Instagram and as the final part of my editing is to sharpen the picture.


The final result: Before and After

The next picture is one of my favourites which also brought some more colour onto my feed. To still have it match, I simply did all the editing I always do .
First up: Facetune, where I whitened the marble background which you can see in the collage below,

Comparison: Before and After
For my second step I uploaded the picture to Snapseed. As already explained this is an app where you can edit small parts of your picture like in my case the one toast that looked a little bit dark. I chose the selected editing tool, swiped up and selected brightness to only brighten up the area where the toast is.
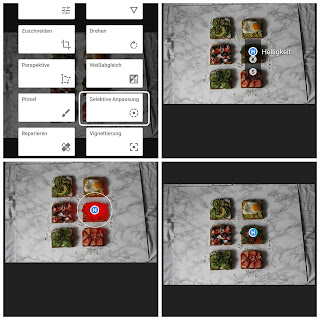
1: choosing the selective tool; 2: selecting brightness;
3: Setting the focus on which part to brighten up; 4: Brightening up the chosen area
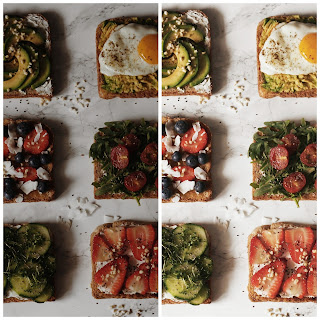
I saved the picture to my camera roll and uploaded it to VSCOcam where I cropped it as a close up, turned down the brightness slightly and then applied my usual filter M5. I usually use the filter on a scale between 7-9.

Down below the comparison of before I uploaded the picture to VSCOcam and after I did my editing on there.


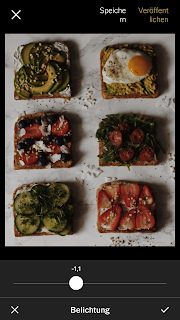
I then turned up the brightness and highlights to achieve the bright look of my pictures which also helps to match my feed.


The last edits were shadows and sharpness.


Comparison: Before and After the edits on Instagram
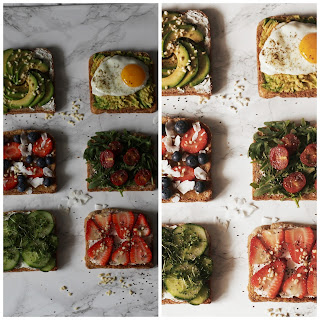
The final result:
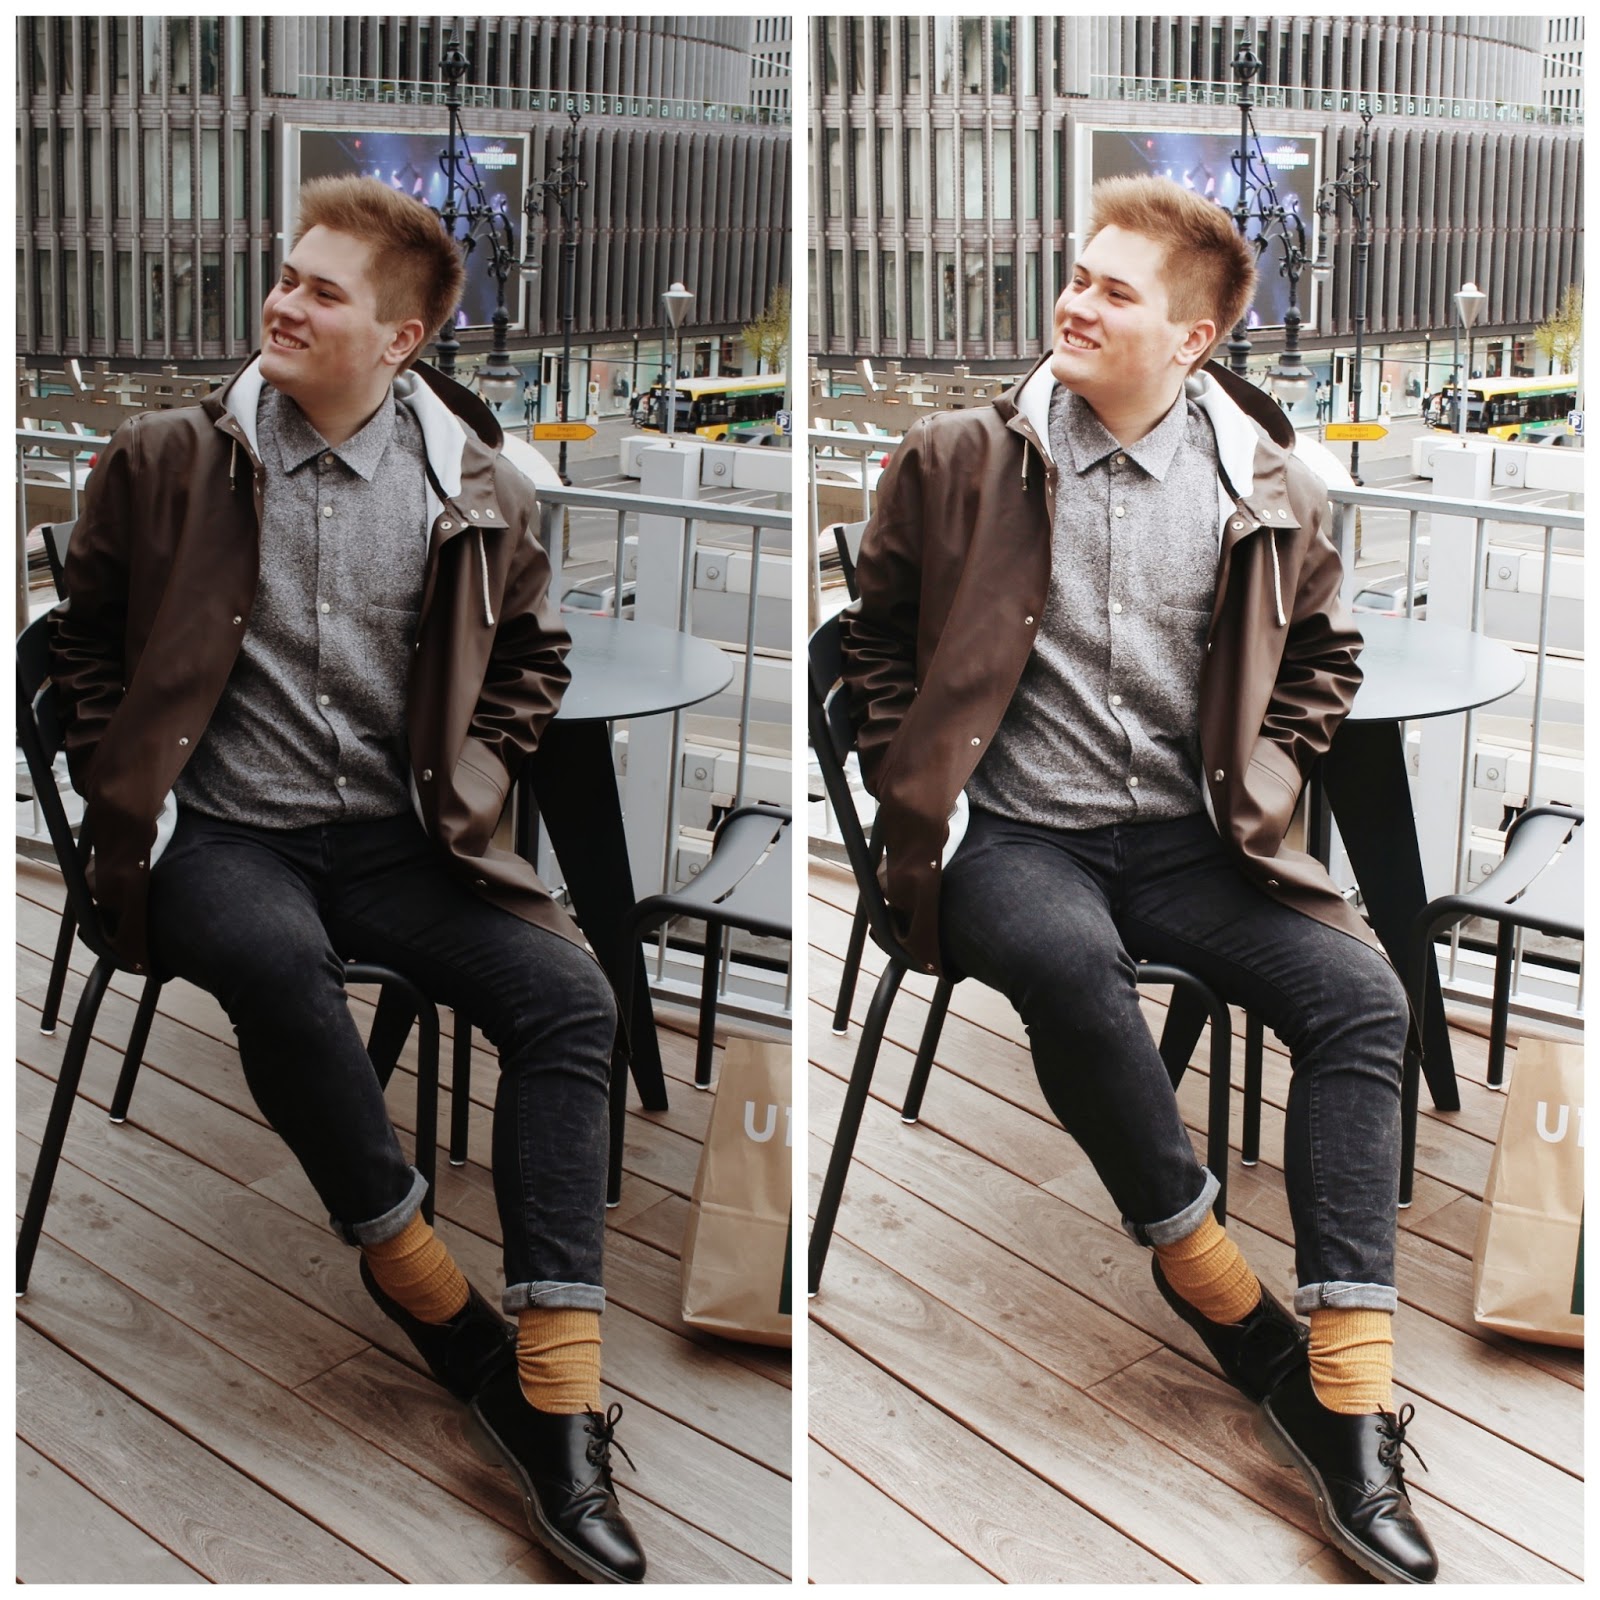
2nd example: Outfit picture
The editing for outfit pictures doesn´t look much different. I started on Facetune to whiten the ground of the terrace because it wouldn´t look good with the filter, wouldn´t match my feed and also would turn yellowish.

Comparison: Before and After
After that I did my edits on VSCOcam. I cropped the picture and turned down the brightness so that the filter works better on the photo.


Following I applied the filter.


Then my editing in shadows and at the end some sharpness.


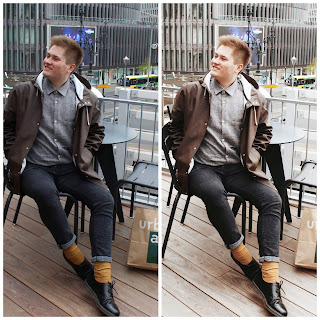
The final result: Unedited and edited picture
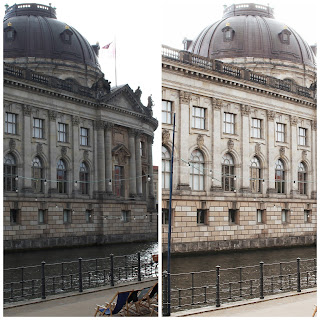
3rd example: Architecture photo
So for the last example I chose to show you how I edit architecture photos because these are normally the easiest to edit.
I started of by uploading the picture to VSCOcam cropped it and used the filter M5.


To end this post I want to say that this is my editing style that I use for my Instagram pictures. Everyone has a different one and will develop a certain style with time. I hope that this long post helped some of you who always wondered how I edit my pictures, maybe inspired some who always wanted to change up their editing or maybe only helped you to take some advice and new ways of editing with you on the way down this Instagram road :)
All the best,
Christopher

7 Kommentare
Mega Post! Danke für den Einblick �� echt interessant wie du deine Bilder so bearbeitest �� -Jessi
AntwortenLöschenHey, vielen vielen Dank für deinen Kommentar! Freut mich, dass dir der Einblick gefällt :)
LöschenThank you so much for this post, it's so detailed, helpful, and probably the best instruction I've ever read. You've really put your heart and soul into it, and I truly appreciate it.<3
AntwortenLöschenHi Anna,
Löschenwow this seriously means the world! I really put much effort into this post and really appreciate your support and comment! :)
Wow echt ausführlich und aufjedenfall hilfreich! Deine Bilder sehen immer toll aus :)
AntwortenLöschenOh danke Jovana, bedeutet mir wirklich viel :)
LöschenVSCO (Android & iOS)
AntwortenLöschenA hugely popular photo editing app amongst Instagram users, VSCO is more than just photo editing, it
offers a community for photographers to connect and create. Simply searching the Hashtag #VSCO on
Instagram will reveal the huge community of photographers and casual users that use VSCO every day, a
testament to the app’s popularity.
VSCO houses all the tools you’d expect from a favourable photo editing app; saturation, highlights,
temperature and vignette can all be adjusted alongside many other settings. VSCO also offers a built in
camera with advanced controls, allowing you to capture the perfect shot, edit and save, all without
leaving the app, an A for convenience. Filters are also a huge feature for VSCO, with the option to buy
filter packs each with their own distinctive styles and tones, very popular amongst users of the app.